
How to recreate the two-tone wall design
That gives you a clean start - less stress, more success.
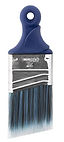
Paint the lighter color first
STEP 5
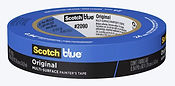
Press firmly. No wobbly bunnies allowed.
Apply painter´s tape ( blue ) right on the line.
STEP 4
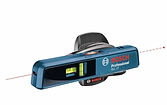
Laser level? Even cooler,
Use your level to draw a straight guideline. ummm almost straight ...
STEP 3
Mark 36 inches from the floor all around the room.
Got super high ceilings? Try 40" instead - go big or go bunny-home!!
Divide smartly
STEP 2
Yes, we are getting technical... but only for a second!!!
Measure your wall height .
STEP 1
Paint your molding in the same shade as the bottom wall for
a clean cohesive look.
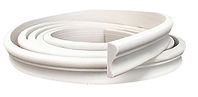
OPTIONAL FINAL TOUCH
Stick your adhesive molding right along the line.
Use a clean cloth to smooth it out like a pro
Peel. Stick. Press
STEP 8
Time to measure your molding
STEP 7
I know patience is hard ... but trust me, it´s worth it.
Let both colors dry completely
STEP 6
Cut to size using scissors or utility blade.
No need to saw or gnaw!!
STEP 1
Sticking Big Decals Like a Pro
Clean the wall
No Dust, no grease - just a clean, dry surface.
If it´s bumpy (hello texture wall!!), give it a gentle sand and wipe again.

STEP 2
Plan your spot
Tape it up first to make sure it´s straight.
Stnad back. Tilt you head. Do the Bunny check
STEP 3
Peel & Stick (Slowlyyyy)
Start at the top and smooth it as you go.
No rush. No bubble. Breathe
STEP 4
Smooth It in
Use a card wrapped in a soft cloth to press it on.
especially with textured walls. Press firmly.
STEP 5
Let It Set
Leave it alone for 24 hours, if and edge pop up, a warm hair dryer
(low heat) helps seal it.
BONUS TIP.
Really bumpy wall?
Take a scraper and knock off the points on your texture
CURTAIN TIPS FOR COOL PARENTS
Hang the rod higher
Put your curtain rod 4 to 6 inches above the window.
It makes the room look taller and brighter!

Make it wider
Let the rod go 8 to 10 inches past each each side of the window.
That way, curtains open fully and the window looks bigger.
Let them touch the floor
Curtains should just kiss the florr or go a tiny bit over it. It feels cozy
and soft.
Try double rods
One for sheer curtains (for soft light), one for blackout (for naps).
Easy light control, boho look stays.
Don´t forget to level!!
Use a level tool to make sure the rod is straight.
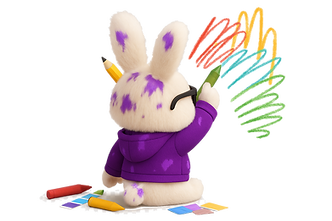
COOL TIPS for when Kids Paint the Walls
Designated "Creative Wall"
Frame out a section of the wall with molding or washi tape and let them paint freely inside it -
It looks intentional, like a mini art gallery.
Clear Chalkboard or Dry- Erase Paint
Instead of fighting the urge, embrance it. Cover a wall section with clear chalkboard or whiteboard paint. Kids
can draw all they want, and it wipes off easily!
Wall Murals- But Kid made-
After a wall is accidentally painted, turn it into a collaborative mural. Add clouds, flowers, rainbows- let their
immagination finish what they started.
Try double rods
One for sheer curtains (for soft light), one for blackout (for naps).
Easy light control, boho look stays.
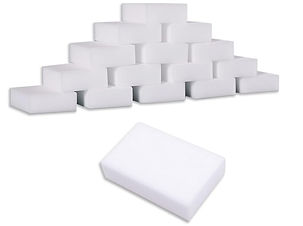
Magic Erasers as Secret Weapons
Keep a stash of Magic Erasers - many crayons maerks come right off.
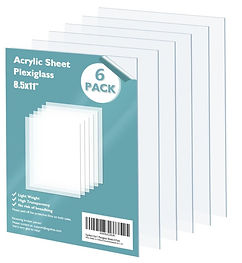
Wall Protection with Clear Acrylic Panels
Instal clear acrylic sheets over a section of the wall ( like a creative fence). Kids can paint with washable markers on finger paints, and you just wipe it clean!
LET THERE BE CHAOS - AND TWINKLE -
Mr. Bunny´s guide to string light magic
1. Drop´em like they are lazy.
Forget straight lines. Let the lights drape, dip, and fall like sleepy jellyfish.
Imperfection = Charm
2. Hide the ugly stuff
Cords, What cords?. Tuck them behind furniture or inside baskets.
Magic needs no wires showing.

3. Stack the sparkle
One string is cute. Three is a vibe. Mix warm tone and spots.
over the bed, around nets, or even wrapped on shelves.
4. Let the stars wander
Skyp symetry. Make lights look they´re drifting - curving around drawings,
plushies, or floating mid-air.
5. Test the "WOW" mode
Turn all all the other lights. Just the string lights On.
If you kid gasps? BOOM , Nailed it!!!